

Bread and baking go hand in hand with the oven. Well, that’s not always the case. Not everyone has an oven, and so people have found creative ways to make bread sans an oven.
Even if your oven has given out on you, it doesn’t mean that you have to give up your bread baking tradition. What about if you’re having a cookout and the oven is full?
You don’t have to wait for hours to get that loaf fresh and ready to eat. Here, you are going to look at four ways you can make bread without an oven.
And no, we are not talking about something that tastes like bread.
We are talking about something with the texture and consistency of actual bread. The shape and the outer crust might be different, but it’s still good-old bread. Let’s now look at the appliances you can use.
Table of Contents
Stovetop
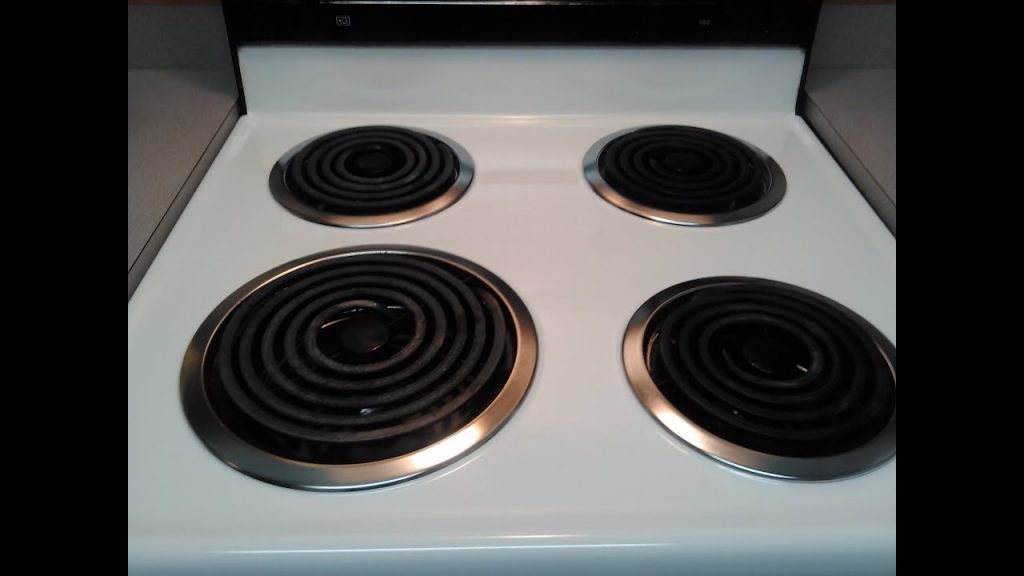
One of the advantages of using a stovetop is that it can be an energy saver. There is also more flexibility, especially if you have a portable kind since you can take it with you camping.
Wherever you go, you can still make that bread you love. Let’s look at the process.
1. Get a heavy large pot, preferably a cast iron. The materials can work too, but you’re risking having a slightly burnt bottom. You want something that will evenly distribute heat so that the bread bakes evenly.
2. Create a thermal ballast within the large pot you have. You can put a can with no wrapper, rocks, or broken pieces of thick tile. What you’re creating as a base where you’ll put the bread pan, but you want something between it and the bottom of the larger pot.
That is so that the bottom of the bread pan doesn’t come into contact with the base. It would cause the bread to burn. This way of doing things also ensures that there’s airflow all around the pan.
3. Now, take a bread pan that fits inside the pot, but it should not touch the sides. Whatever pan you choose, it needs to withstand the heat. Glass is not advisable, but metal or ceramic is preferred.
Given the shape of the pot, you may have to use a round bread pan. However, if you only have a rectangular one, get a pot that’s large enough so that neither of the sides touches the pot. The reason neither type should touch the sides is to ensure there’s uninterrupted airflow.
4. Ensure that the lid can close comfortably. Once that’s done, reinforce the lid with another one. You don’t want the heat to escape; you want to trap as much as possible so that it goes back down within the large pot. Close any pressure holes with a nut so that heat remains contained.
5. Preheat the dutch oven over the largest burner you have. At this point, the bread pan won’t be in yet. You want to heat the thermal ballast at the bottom and the entire pot in general. For that to happen, keep the lid closed. Turn the burner on high heat for a few minutes and then reduce it. It should be hot enough.
6. Take the bread pan and rub some oil on it before dusting flour to cover all the inner surfaces. After, take the bread dough you’ve prepared and put it in the pan. It should touch all the sides. The dough will rise when baking, so it shouldn’t reach the rim of the pan.
7. Using even mints, open the lid and put the pan inside the dutch oven. Place the bread pan carefully into the center of the pot, making sure the spaces around are even. You want to do this with precision so that you don’t burn yourself on the hot pot. Tongs, if they can allow, would make the process easier. Close the lid and let the bread bake.
8. Bake the bread for about 20-30 minutes. On the 20-minute mark, check to see if the dough is cooked. It won’t have a brown crust, but you’ll still be able to tell if it’s ready. Once it’s ready, remove the bread pan and transfer the bread on a cooling rack.
Slow cooker
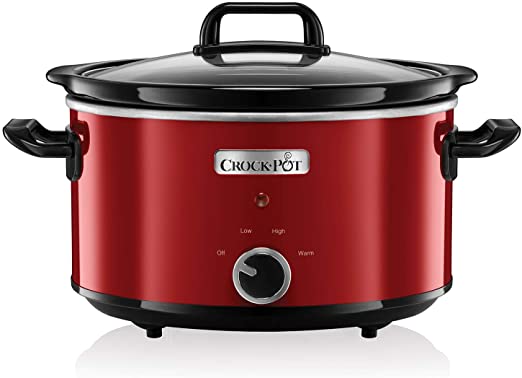
If you have your Crock-Pot lying around, you can also use that to make yourself some freshly baked homemade bread. This approach does feel counterintuitive because other methods tend to opt for high heat, and the bread cooks in record time.
It still does serve as a good alternative for when your oven is occupied, or it’s too hot to have your oven on. The good thing is the highest setting on most slow cookers tend to be 200 degrees Fahrenheit.
That’s about the internal temperature required while baking most loaves of bread. You can then let the bread remain in the slow cooker into the interior is done.
The other advantage of a slow cooker is that you don’t have to wait for the bread to rise before putting it in. You can finish with the dough and up it inside immediately.
The time it takes depends on the type of cooker you have. A six-quart slow cooker will take the bread about two hours to cook through. For stronger models, you can even have an average baking time of one hour.
The best way to know if it’s ready is by checking the internal temperature, which should be what we’ve mentioned. Otherwise, check on the bread after the first hour and every thirty minutes after. The top should also feel solid. When it’s spongy, then it means you still have some ways to go.
Microwave
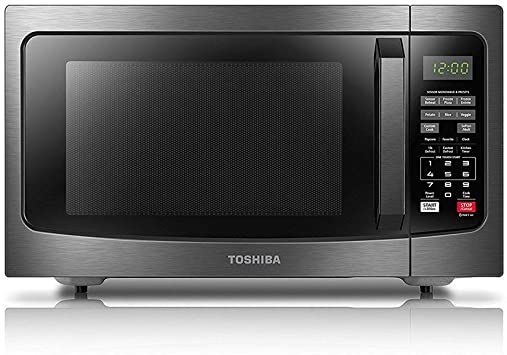
If you’re taking the microwave route, then you’ll have to part with the idea of traditional bread. Instead, the dough you make will be the same as that of a sugarless cake.
The only difference is that you’ll turn it into a dough instead of giving it a runny consistency. Instead of yeast, you’ll use baking powder so that it still rises.
After making the dough, put it in a safe microwave dish. It goes without saying, a metal bread pan should under no circumstance go into the microwave. Whatever item you choose, ensure that it is labeled microwave safe.
Some people might also prefer a ceramic mug instead of making single servings. Put the dough into the microwave for three to five minutes at high heat. Use the microwave window to keep an eye on it as some microwave has different strengths.
Toaster oven
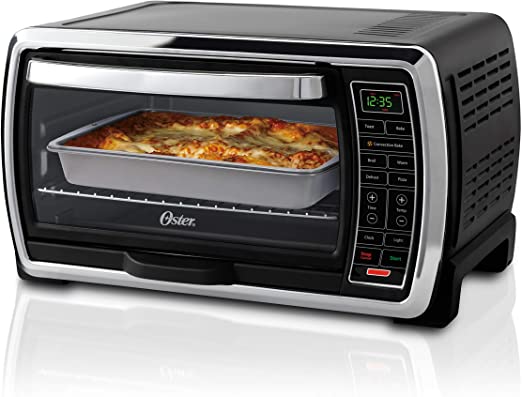
This alternative for making bread is considered challenging, but it can still yield some pretty good results. The obvious issue is that the toaster oven is meant to heat food, not cook or bake it.
Even so, with some creativity applied, there’s a way around it. The size of your toaster oven will determine the size of the bread you make, but overall, they’ll be on the smaller side.
The dough you put in should be even smaller to accommodate rising. Just as with an oven, you’ll have to preheat the toaster oven and the baking surface. Add about 50 degrees on top of what you’d typically use to preheat your oven.
That’s because of how fast toaster ovens lose heat quickly when you open the toaster oven door. You want to maintain an initial high heat so that your bread rises. Do the same thing with the baking sheet you’re using. Heat it higher than you typically would an oven.
The other idea is to make small tweaks to the bread dough, so it has an easier time cooking through. As for the spaces around the door, you can put a metal tray to prevent the heat from escaping. Try not to open the door too often as you’ll lose heat.
Wait for it to turn brown. To know if it’s ready, tap on the bread. A hollows sound means it’s ready. You can also put an aluminum foil over the loaf to have the bread cook evenly. The heating elements are close to the dough, and that can cause the outer later to burn before the middle is read.
Wrap up
With these alternatives to bread making, it is only the stove hack that allows you to cook the bread dough as-is. For the others, you might have to make adjustment to the dough especially because of how the heat is dispensed throughout the baking process.
Also, appliances are different, and so you’ll have to enter some unchartered waters to know what works for you. You can have a general guide, but making peace with trial and error will get you the perfect balance of dough and heating that you need to get that bread you want.